
gitlab-cicd配置
# 介绍
之前使用过的 cicd 是用 travis,这个项目也是用他做的自动部署,而 gitlab 他也有提供 cicd 的,为了实现推送代码,自动打包,然后推送到远程服务器这么个场景,我尝试着使用 gitlab-cicd。刚开始的时候,我尝试着在本地利用脚本 ssh 连接远程服务器,但是由于自己本地是 windows 环境,经过一番试验后,失败了,失败的原因是因为传输文件的时候,需要打密码,所以放弃了,现在想想,或许可以直接配置密钥免密登录,这套方案或许也能成功。
# gitlab-runner
关于 gitlab 自动部署的知识,gitlab-runner 是一个很重要的角色,首先我们需要安装他,他是一个 cicd 的执行者,他也可以跟 gitlab 部署到不同的服务器,因为在注册的时候,需要用到 token 去注册,所以说,他拉项目代码的时候,就利用这个 token 去拉取的,这有点类似于 travis。下面我们看看怎么安装他,只需要几条命令,我这里选择使用 docker 安装 gitlab-runner。
# 1.拉取 Runner 镜像并启动
docker run -d --name gitlab-runner --restart always -v /srv/gitlab-runner/config:/etc/gitlab-runner -v /var/run/docker.sock:/var/run/docker.sock gitlab/gitlab-runner:latest
# 2.进入 Runner 容器内
docker exec -it gitlab-runner bash
# 3.注册 Runner
gitlab-runner register
注册 runner 时,后面会弹出很多注册相关的项进行填写,最重要的是最后一项
Please enter the executor: ssh, docker+machine, docker-ssh+machine, kubernetes, docker, parallels, virtualbox, docker-ssh, shell: docker
这个是选择 runner 的执行器,我选择了 docker,他会关联一个镜像,在 runner 执行的时候,他会先拉取关联的镜像进行 job 执行。
# 4.网页端
这个时候我们就拿看到 runner 注册成功了,并且能在网页看到:
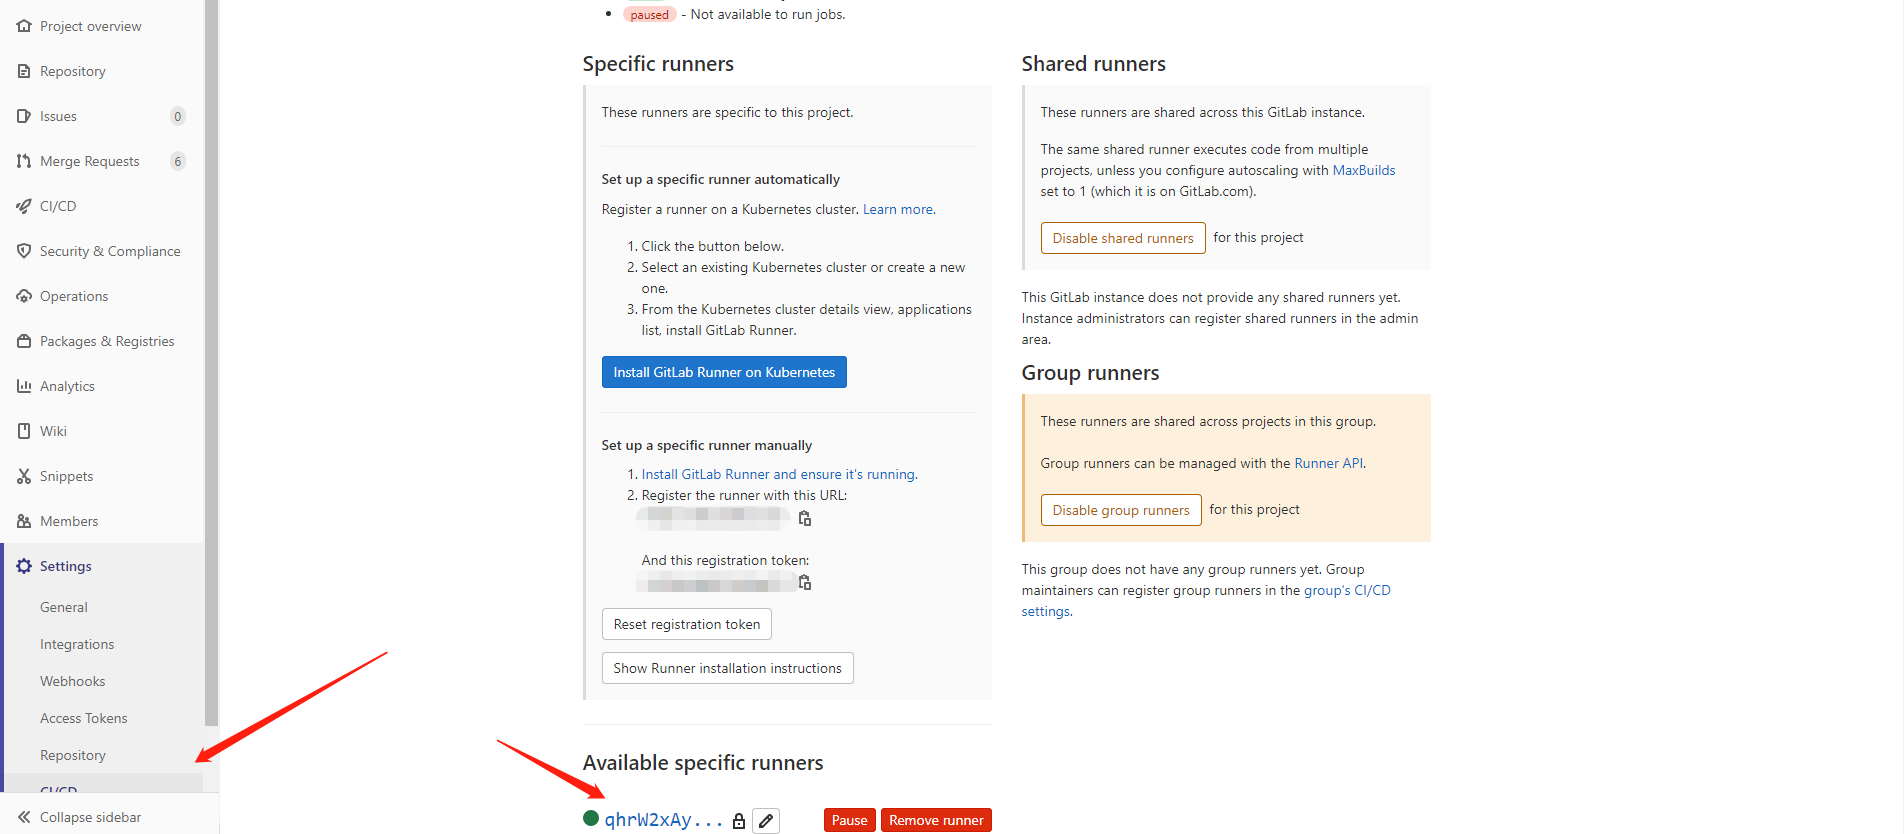
runner 可以注册多个,只要继续执行 gitlab-runner register 即可!!!
# 关于 gitlab-runner 的环境
gitlab-runner,他是 docker 构建的,所以,他存在于 docker 里,我们可以 docker ps 查看到,所以说,我们在跑 yml 文件的时候,此时的环境目录就是 docker 容器内,这是一个很重要的知识点,之前一直不能 cd 到外层目录,就是因为这个踩了这个坑,自己对于 docker 的概念不熟,现在慢慢的对于他,有所了解了。
# 配置 ssh 免密登录远程服务器
gitlab-runner 我们安装并注册成功了,接下来,我们需要在 gitlab 服务器远程我们的部署服务器,所以需要先生成 ssh 密钥,把公钥添加进远程服务器,我们连接的时候,带上私钥去连接,这样我们就不要输密码了。
# 1.生成密钥对
ssh-keygen -t rsa # rsa 是加密算法,还可以选择 dsa 等算法
# 2.将 id_rsa.pub 放入服务器
ssh-copy-id <username>@<host> # 这会追加公钥在远程服务器的~/.ssh/authorized_keys 文件中
用这条命令是最合适的,不要用 scp ~.ssh\id_rsa.pub username@host:.ssh\这条命令,这可能会有问题,对于 authorized_keys 文件。 然后我们 ssh 远程连接服务器,就会发现不需要打密码了。
# ssh 踩坑记录
安装准备都可以了。这里面踩的坑属实是 ssh 这一流程,花了我 2 天时间,无论我怎么做,他都是 failed,看着几百条 failed 的 pipeline,心力交瘁,使用了 shell 执行器,在 gitlab-runner,add ssh-keys,runner 跑的时候,一直没有密钥,无论在外层,还是 docker 内,ssh-keys 都加了个遍,但无论怎么做,他在 runner 跑的时候,私钥就是不存在/.ssh 文件夹下,很奇怪,然后搜了很多资料,发现官方给我们推荐的说法是,ssh 连接,需要在 gitlab 网页使用变量存储私钥,然后在 runner 跑的时候,使用变量读取。
# 1.添加私钥到 gitlab 网页
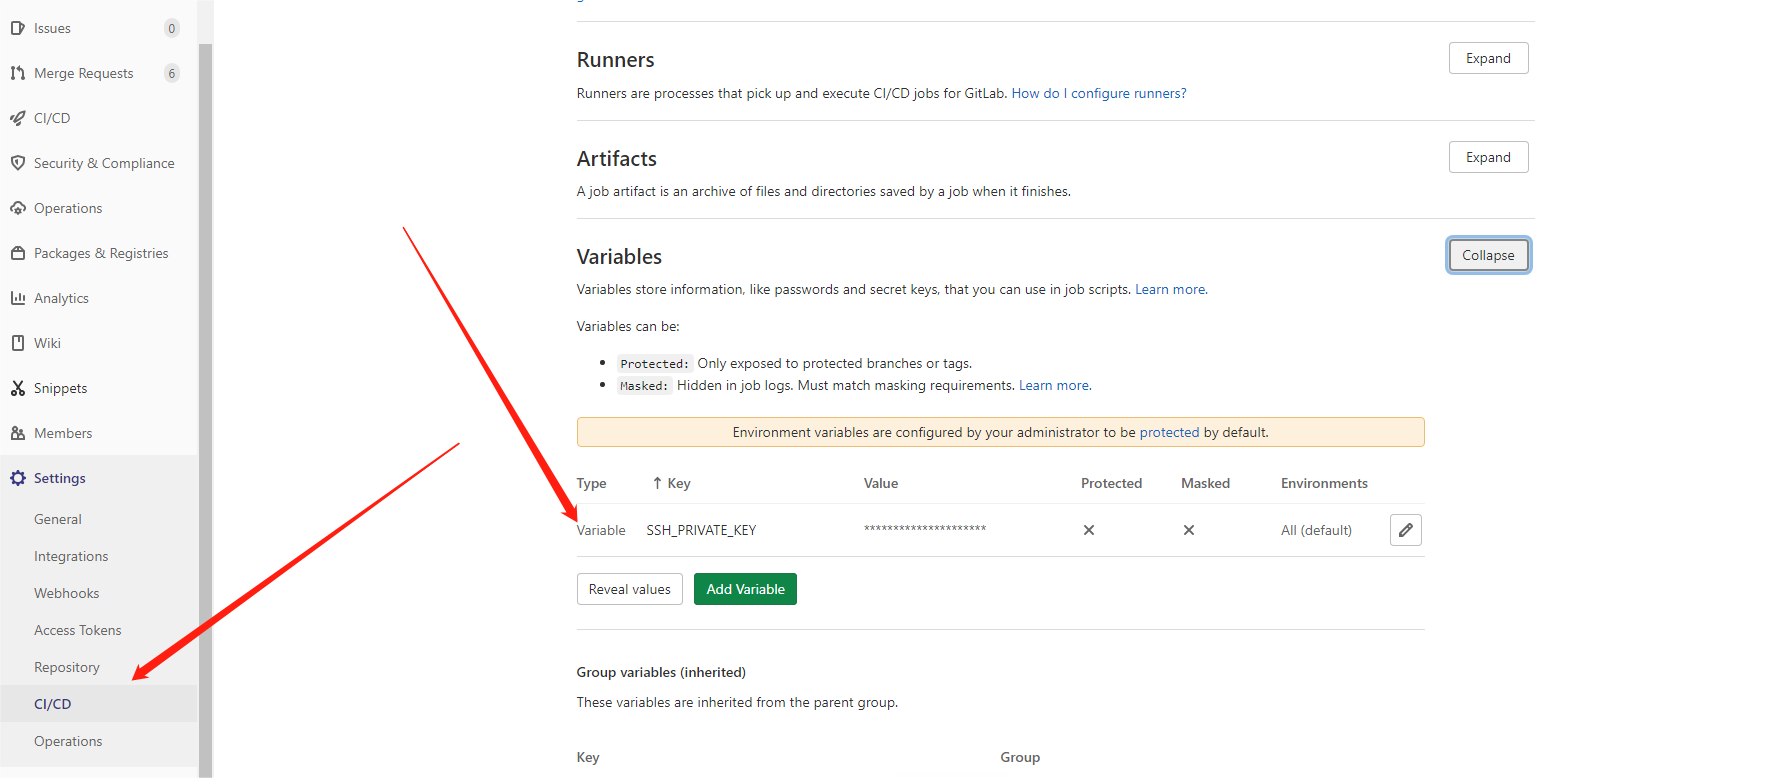
将在服务器生成的私钥复制到这里
# 2. yml 文件编写读取 ssh 私钥
before_script:
  ##
  ## Install ssh-agent if not already installed, it is required by Docker.
  ## (change apt-get to yum if you use an RPM-based image)
  ##
  - "which ssh-agent || (yum update -y && yum install openssh-client git -y)"

  ##
  ## Run ssh-agent (inside the build environment)
  ##
  - eval $(ssh-agent -s)

  ##
  ## Add the SSH key stored in SSH_PRIVATE_KEY variable to the agent store
  ## We're using tr to fix line endings which makes ed25519 keys work
  ## without extra base64 encoding.
  ## https://gitlab.com/gitlab-examples/ssh-private-key/issues/1#note_48526556
  ##
  - echo "$SSH_PRIVATE_KEY" | tr -d '\r' | ssh-add -

  ##
  ## Create the SSH directory and give it the right permissions
  ##
  - mkdir -p ~/.ssh
  - chmod 700 ~/.ssh

  - ssh-keyscan gitlab.com >> ~/.ssh/known_hosts
  - chmod 644 ~/.ssh/known_hosts
这样我们就完成了。
# yml 文件
最后的最后,贴一下自己的 yml
# 缓存
cache:
  paths:
    # node 下载的依赖
    - node_modules
    # 打包结果
    - dist
# pipeline 阶段
stages:
  # 构建
  - build
  # 部署
  - deploy
# build 阶段的工作
build-job:
  only:
    - master
  stage: build
  tags:
    - build
  script:
    - npm -v
    - node -v
    - echo "🚚 开始安装依赖"
    - npm install
    - echo "😄 安装依赖成功"
    - echo "🚚 开始打包"
    - npm run build
    - echo "😄 打包成功"

# deploy 阶段的工作
deploy-job:
  only:
    - master
  stage: deploy
  tags:
    - build
  before_script:
    ##
    ## Install ssh-agent if not already installed, it is required by Docker.
    ## (change apt-get to yum if you use an RPM-based image)
    ##
    - "which ssh-agent || (yum update -y && yum install openssh-client git -y)"

    ##
    ## Run ssh-agent (inside the build environment)
    ##
    - eval $(ssh-agent -s)

    ##
    ## Add the SSH key stored in SSH_PRIVATE_KEY variable to the agent store
    ## We're using tr to fix line endings which makes ed25519 keys work
    ## without extra base64 encoding.
    ## https://gitlab.com/gitlab-examples/ssh-private-key/issues/1#note_48526556
    ##
    - echo "$SSH_PRIVATE_KEY" | tr -d '\r' | ssh-add -

    ##
    ## Create the SSH directory and give it the right permissions
    ##
    - mkdir -p ~/.ssh
    - chmod 700 ~/.ssh

    - ssh-keyscan <host> >> ~/.ssh/known_hosts
    - chmod 644 ~/.ssh/known_hosts
  script:
    - echo "🚚 开始发送包"
    - ssh root@<host> "cd /usr/local/nginx/html/command/ && rm -rf dist"
    - scp -r dist root@<host>:/usr/local/nginx/html/command/
    - echo "😄 部署完成"