
vuepress项目部署到github page
phy-lei 2020-05-26
vuepress
# 方法介绍
# 1.配置deploy.sh
在根目录下新建deploy.sh文件
#!/usr/bin/env sh

# 确保脚本抛出遇到的错误
set -e

# 生成静态文件
npm run build

# 进入生成的文件夹
cd docs/.vuepress/dist

# 如果是发布到自定义域名
# echo 'www.example.com' > CNAME

git init
git add -A
git commit -m 'deploy'

# 如果发布到 https://<USERNAME>.github.io
# git push -f git@github.com:<USERNAME>/<USERNAME>.github.io.git master

# 如果发布到 https://<USERNAME>.github.io/<REPO>
git push -f https://github.com/phy-lei/blog.git master:gh-pages

cd -
脚本执行完后,会将自己的代码推送到自己的仓库,并生成一个gh-pages分支,这个分支会去将master分支构建出来,然后点击github的Settings,滑到下面会看到
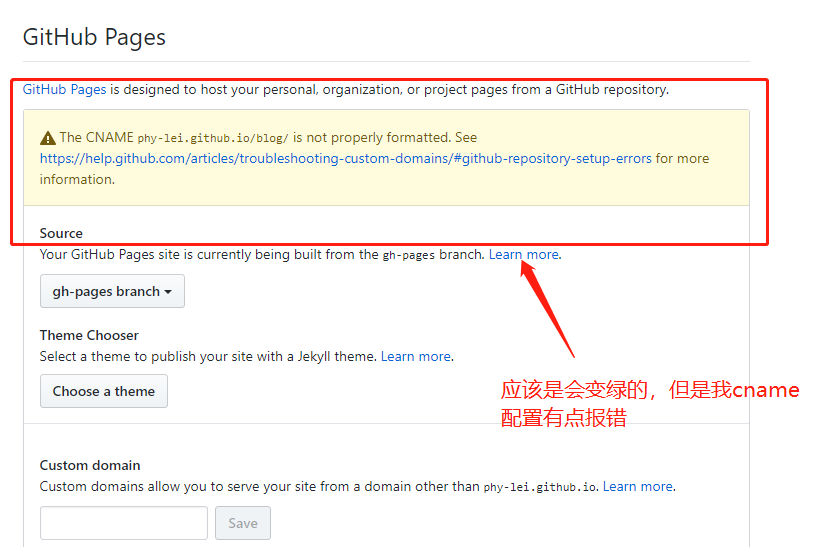
然后就会有一个你项目网站的地址已经挂载到github page服务器上了,并可以在线上访问你的项目了
# 2.使用travis-ci.com自动部署项目
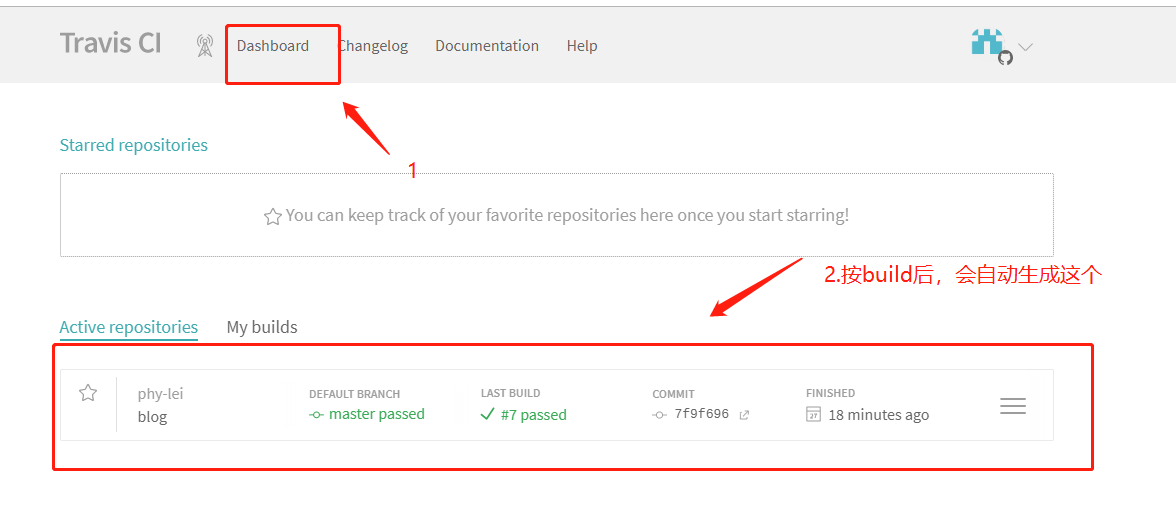
使用https://travis-ci.com/这个网站,可以自动关联自己仓库的项目,然后自动构建,自动部署到服务器上,就不用自己再执行push再deploy了
用github登录好后,选择好你项目上的分支
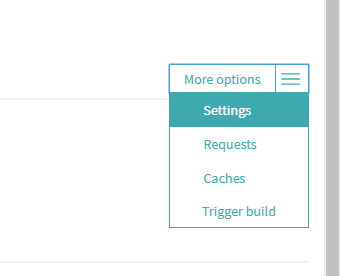
点击进去后,在右边,有个setting
然后填好token,至于token,是在自己github上新建一个
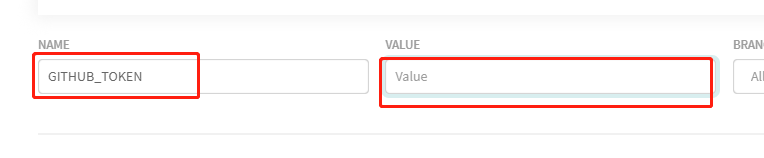
github生成token,关联起来

全部设置好后,在项目上新建一个.travis.yml文件,这个文件是给travis识别后,触发里面的命令的
language: node_js
node_js:
  - lts/*
install:
  - yarn install # npm ci
script:
  - yarn build # npm run docs:build
  - yarn cname
deploy:
  provider: pages
  skip_cleanup: true
  local_dir: docs/.vuepress/dist
  github_token: $GITHUB_TOKEN # 在 GitHub 中生成,用于允许 Travis 向你的仓库推送代码。在 Travis 的项目设置页面进行配置,设置为 secure variable
  keep_history: true
  on:
    branch: master
再新建一个cname.sh
# cname.sh

#!/usr/bin/env sh

# 确保脚本抛出遇到的错误
set -e
#echo '你的网站域名' 没有可以写空
echo 'https://phy-lei.github.io/blog/' > docs/.vuepress/dist/CNAME
最后,我自己写了个git自动 push的脚本,这样就不用每次add commit push啦
#!/usr/bin/env sh

# 确保脚本抛出遇到的错误
set -e

# 如果是发布到自定义域名
# echo 'www.example.com' > CNAME

git init
git add -A
git commit -m 'deploy'

# 如果发布到 https://<USERNAME>.github.io
# git push -f git@github.com:<USERNAME>/<USERNAME>.github.io.git master

# 如果发布到 https://<USERNAME>.github.io/<REPO>
git push

cd -
之后在pack.json,使用
  "scripts": {
    "dev": "vuepress dev docs",
    "build": "vuepress build docs",
    "deploy": "bash deploy.sh",
    "cname": "bash cname.sh",
    "travis": "bash deployGit.sh" //自动部署的命令
  },
不得不说,这个github是真的强大!!!